

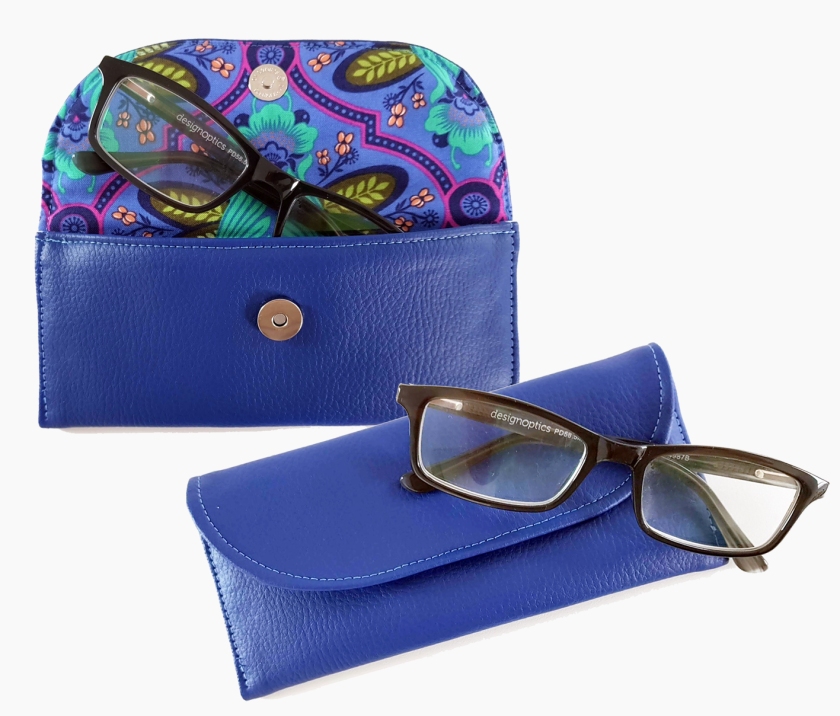
I was making one of these bowed front glasses cases yesterday for my husband and posted the pics on Facebook. I had quite a few requests for the pattern so I thought what the heck, let’s make one for myself and do a quick tutorial, so here goes-
Please see my new blog at https://www.spencerogg.com/
and my Youtube channel at https://www.youtube.com/c/spencerogg where you will find a video tutorial for this case.
A fab 30 minute make. Ideal for a gift for a teacher or relative, or maybe just a quick treat for yourself, a great scrap buster that takes less than a fat quarter.
Download the free cutting template: Groovy Glasses Case pattern piece
Watch the video tutorial on YouTube: Video Tutorial
You will need:
2 small squares of fabric 10 x 9” – one for outer and one for the lining – I used vinyl for the outer and quilting cotton for the lining
A magnetic clasp
Medium weight fusible interfacing (MWFI)
A small square of Fusible fleece (optional)
The Seam allowance is 1cm (3/8”) throughout. The seam allowance is included in the pattern piece
Approximate finished dimensions: 17 x 8 cm (6.75 x 3.25”)
Skill level: Easy
All my patterns can be made on a domestic sewing machine, I am using the Janome Atelier 7.
Print off the pattern sheet making sure the box ‘actual size’ is ticked and the ‘shrink to fit’ or ‘fit to page’ box is unticked on your printer settings, or your printer may reduce the size. There is a 1” square control box shown on the pattern for you to check before cutting.
Prints on 2 pages of A4 or US letter size paper.Groovy Glasses Case pattern piece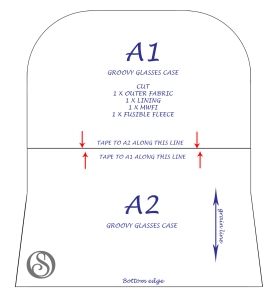
Cut one each of outer, lining, medium weight fusible interfacing, and fusible fleece.
Fuse the medium weight fusible interfacing to the outer piece (not needed if you are using vinyl)
Trim the fusible fleece down by 1cm all round to keep bulk out of the seams, then fuse centrally to your lining piece.
Press up a 1cm (3/8”) hem on the bottom edge of both outer and lining. If you are using vinyl, use Wonderclips rather than pressing. I’m sure you know why !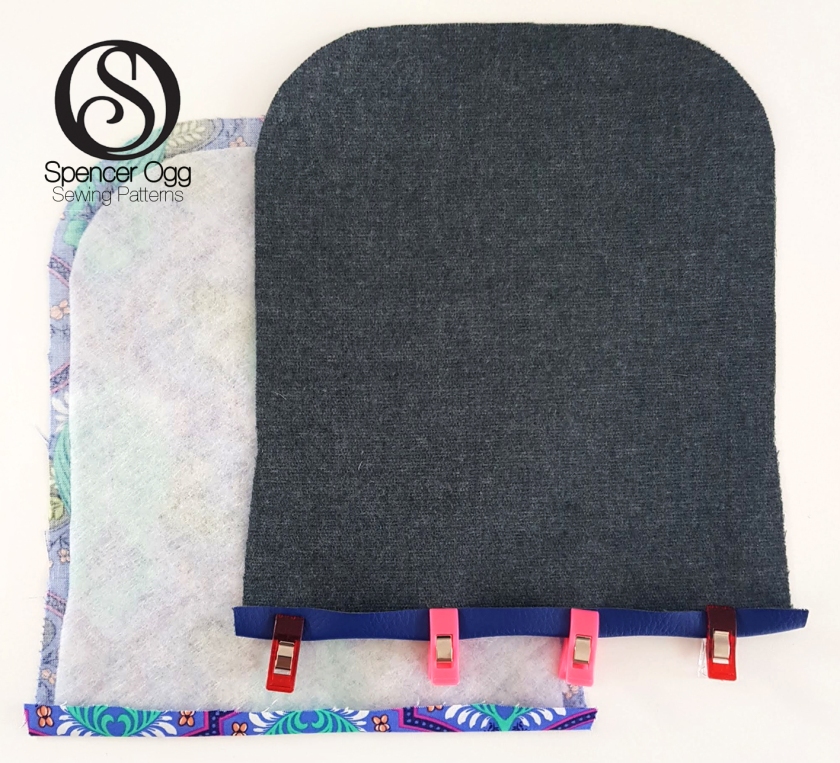
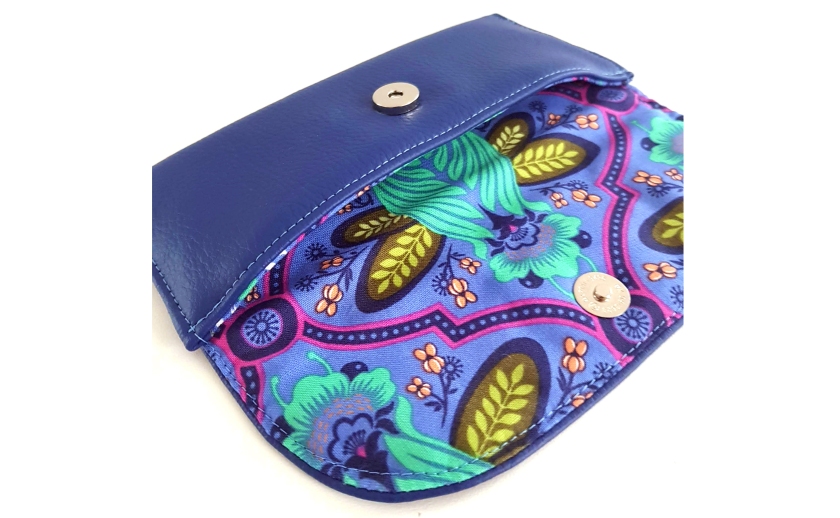
Attach the male part (the slimmer part) of the magnetic clasp to the top curved edge of your lining piece centrally 2.5cm (1”) down. I like to add a bit of firm interfacing to the back to strengthen.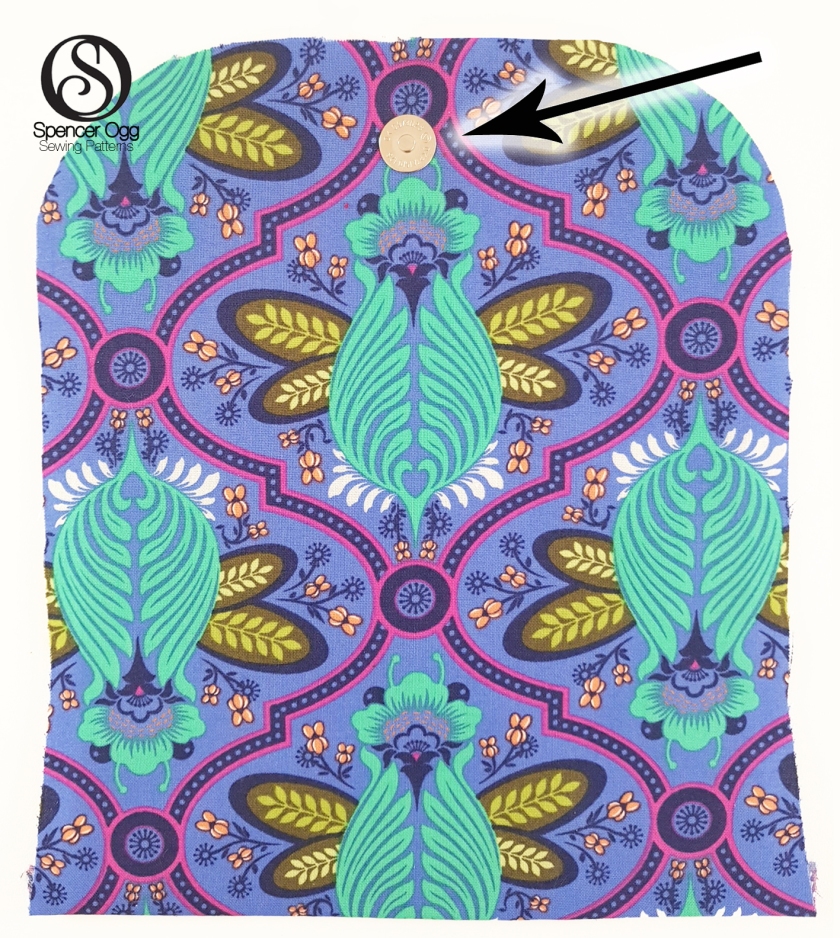
Lay the fused outer and lining pieces right sides together matching all edges and with pressed hem edge folded up
Stitch around all 3 sides apart from the bottom folded edge, with a 1cm (3/8”) seam allowance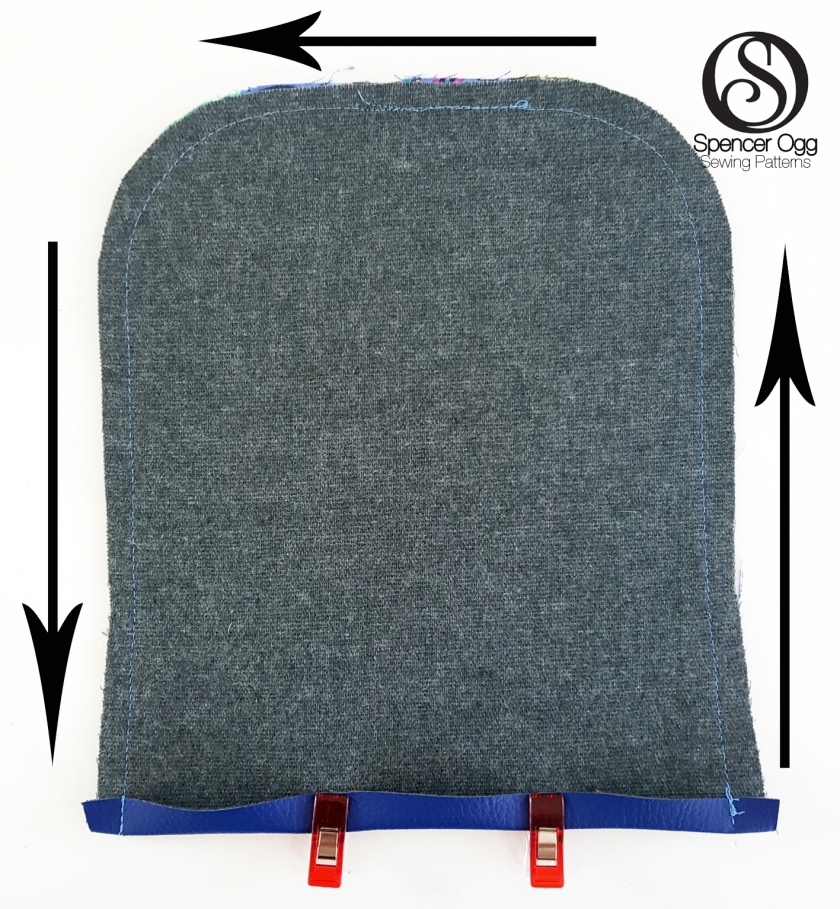
Trim corners and curves and turn through.
Fold the bottom edge up by 7cm (2 3/4”). (Your bottom edge is still folded inside) Pin or clip at the side seams to hold it in place – The pattern widens at this point so you will need to push the side seams in a little at the top so they fall in line with each other – this gives us the bowed shape front and the extra room we need to keep our glasses in.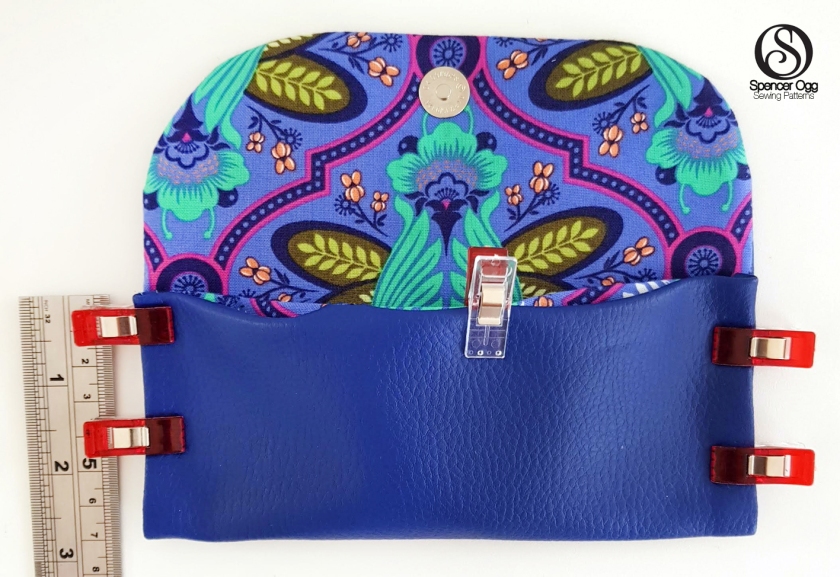
Fold the top flap edge down and check where the nipple of the male part of the clasp lands. Make a mark with chalk or disappearing pen (Keep that folded bottom edge folded inside)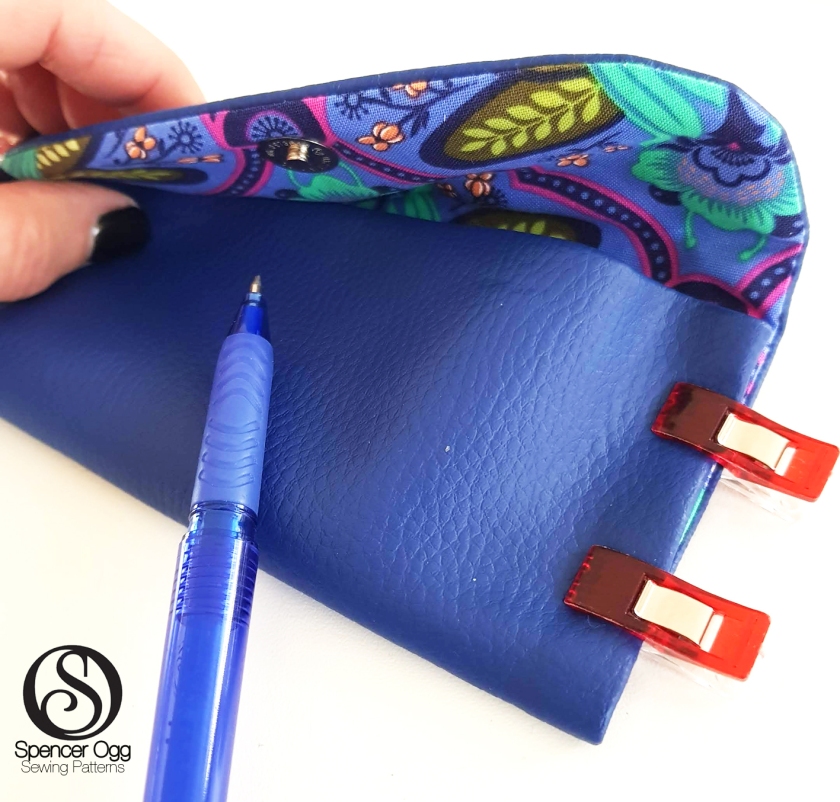
Attach the female part of the clasp here, just through the outer layer, hold the lining back out of the way. I used a small piece of firm interfacing on the back to strengthen again.
Open the piece out again, and with the bottom edges still folded in, topstitch 3mm (1/8”) all the way across this edge. This closes the folded edge and gives a neat finish.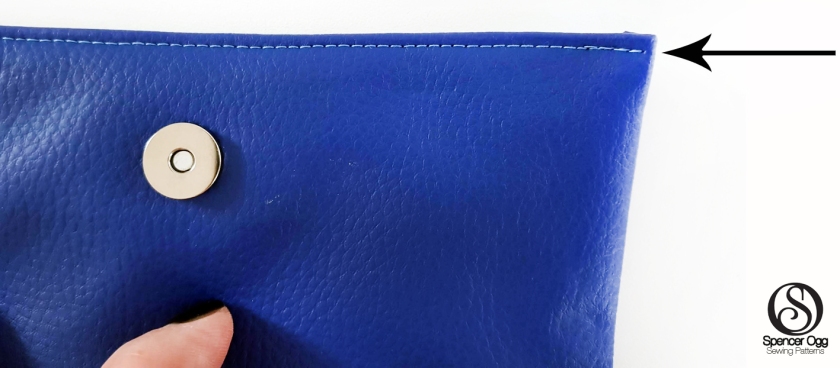
Fold the bottom edge back up again by 7cm (2 3/4”). Make sure your side seams are lining up. Pin or clip in place.
Double check that your magnetic clasp is closing correctly, adjust the side seams a little if you need to.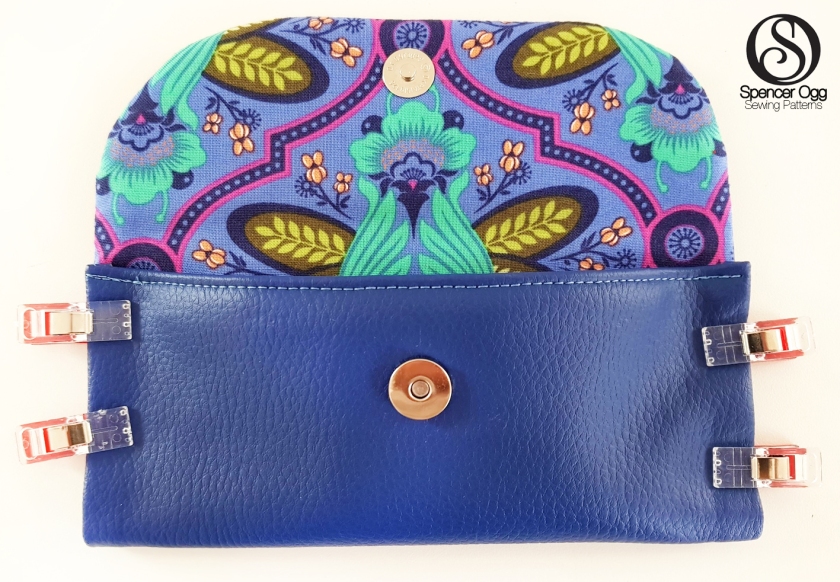
Topstitch all the way around your case from the folded edge on one side, all the way around the flap and back down the other side seam.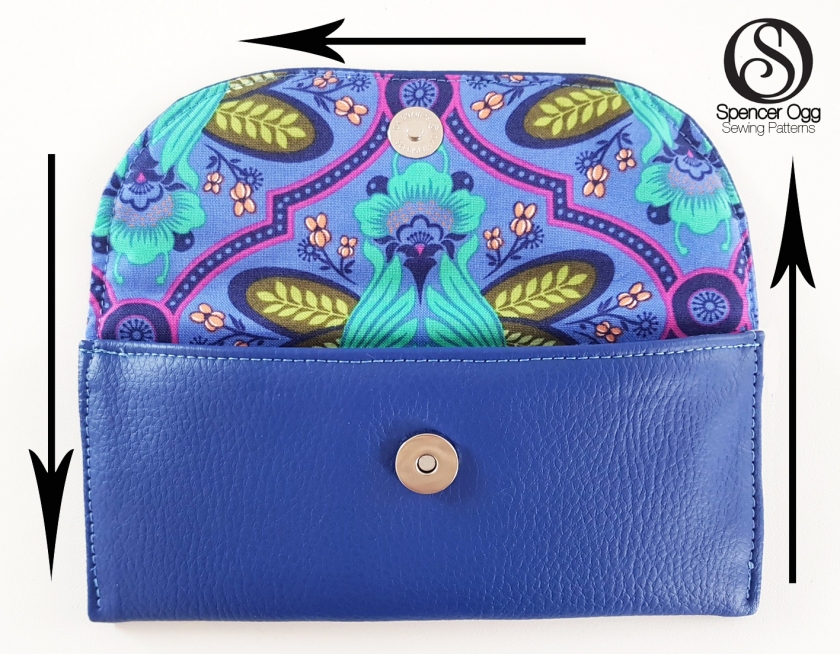
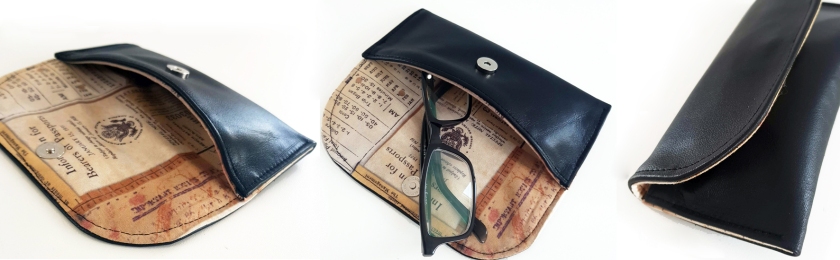
And there you have it – a super easy case for your sunglasses or glasses. Tea and biscuits all round!
Download the free cutting template here: Groovy Glasses Case pattern piece
 Great for men, women or your sunglasses! You can reduce or increase the size of the pattern easily on a photocopier or printer if you want to make it in different sizes.
If you have made a Spencer Ogg pattern, or bag making is your thing, why not join my Facebook board Spencer Ogg Bag Sewing Group where you will find bag making fun and another free glasses case shape pattern
I hope you enjoyed making your glasses case and found the instructions easy to follow.
I’d love to see your creations, please share using #spencerogg
Find more of my PDF patterns on my Website
Please see my new blog at https://www.spencerogg.com/
and my Youtube channel at https://www.youtube.com/c/spencerogg


Copyright Information
You may sell items made from this pattern on your shop or website on small scale. All items for sale must be handmade by you. Please offer Spencer Ogg design credit in any written description. You may not sell this pattern to others.
c 2018.Spencer Ogg. All Rights Reserved.
![]()

thank you i will try this for my own glasses as i am all ways looking for them
LikeLiked by 2 people
Great. Hope you enjoy it. Post pics!
LikeLiked by 1 person
Thank you for actually providing a pattern. I don’t want to download more software.
LikeLike
great thank u 🙂
LikeLiked by 1 person
Hope you enjoy making it 😃
LikeLiked by 1 person
I made a Groovy this evening….great tutorial, great results! Thanks so much Diane.
LikeLiked by 1 person
So glad you liked it. I’m going to make some more now for all my case-less sunglasses hanging around the house. Cork might work well.
LikeLiked by 1 person
Thank you so much for sharing your amazing talent with us.
LikeLiked by 1 person
My pleasure, hope you enjoy making it.
LikeLike
Thank you for sharing, especially for a self taught practicing and easy to follow pattern, dorah xx
LikeLiked by 1 person
You are welcome Dorah
LikeLike
Thank you so much for sharing!
Looking forward to making 🙂
LikeLiked by 1 person
Do post your pics Bettina #spenceroggpatterns
LikeLike
I just bought this identical fabric today! I am excited to work on this project.
LikeLiked by 1 person
Great, let us see your pics !
LikeLike
Hiya, I am really glad I have found this information. Nowadays bloggers publish just about gossips and net and this is actually irritating. A good web site with exciting content, this is what I need. Thanks for keeping this site, I’ll be visiting it. Do you do newsletters? Can’t find it.
LikeLiked by 1 person
Thank you, so kind of you to say so. You can subscribe by adding your email. I also have a YouTube channel with lots of free tutorials where you can subscribe at: https://www.youtube.com/channel/UCSIOnZwMSFshiHMUXwzq51w
LikeLike
Glad to be one of the visitants on this awesome internet site :D.
LikeLiked by 1 person
Thanks, I have just been searching for information about this subject for ages and yours is the greatest I have came upon so far. But, what in regards to the bottom line? Are you sure about the source?
LikeLike
Not sure which line, do e mail me on diane@spencerogg.com so I can help further
LikeLike
I am thus pleased I’ve ultimately hit your blogging site.
Thanks a great deal for your job, it seems a personal devoted hours comprising it.
The last time period I had the exact same impact regarding the article was actually here .
It corrects now therefore challenging to locate something thus substantially looked into.
You made my time!
LikeLike
I want to try this but am a little apprehensive about it. What size needle do you need and I am sure you have to adjust the tension. I hate messing with the tension, because it is so difficult readjusting it again.
Linda D.
LikeLike
This is a nice easy project to practice on. Your needle and tension depend on the fabric you choose. Why not join my Facebook group for lots more info on your query and to pose any questions you wish https://www.facebook.com/groups/spencerogg
LikeLike